Embroidery Digitizing
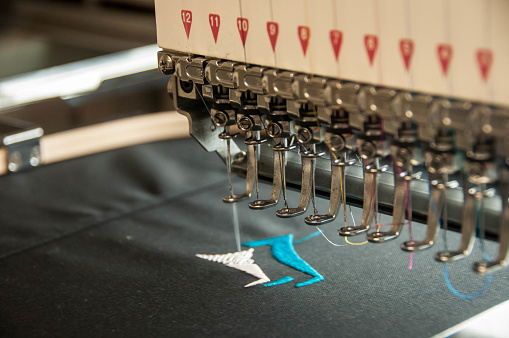
The process of putting artwork into a digital format that embroidery machines can understand and use to direct the path of the needle is referred to as “digitizing”. Cheap embroidery digitizing is a time-saver and money-saver for everyone because it’s accessible and inexpensive. Because embroidery machines are unable to read the same kinds of files that your personal computer can, you will need to digitize your company logo and save it in a format that can be read by the machines before you can have them do their function. The vast majority of embroidery machines come pre-installed with their very own software, which enables us to control their functions while also adhering to the instructions provided by a file that has been digitalized.
Advantages of Choosing Embroidery Digitizing
When looking for an embroidery digitizing service, it is in your best interest to select one that has an impeccable track record of producing high-quality work. Because embroidery digitizers have the necessary skills and knowledge, they are able to examine the sew-out of embroidery designs to ensure that the designs are reproduced correctly. The procedure starts with the conception of a concept or the creation of an artwork that is intended to be embroidered. The digitizer operates with a great deal of attention in order to get the greatest possible results. The completion of this process requires a great amount of time, but the end product makes the work more than worthwhile. A digitizer for embroidery who has received adequate training will not only do high-quality work but also do so at competitive rates. The digitizing of embroidery can be done for a very low cost. These days, there is a strong demand on the market for cheap embroidery digitizing.
Basic steps of Digitizing
- The first thing that needs to be done is to determine the desired design size, the type of cloth, the artwork, and any further requirements.
- Get your artwork ready to be digitized.
- Make a decision regarding how the design will be executed on an embroidery machine from beginning to end.
- Assign different sorts of embroidery stitches to different regions of the garment while taking into account elements like the type of fabric and the “push and pull” of the garment.
- Run simulations of the design to see whether or not the digitization needs to be modified.
A Harmonious Stitching Arrangement by a Digitizer
The embroidery digitizer is responsible for achieving the perfect balance of stitches when the design is being digitized. Considering that embroidered designs are prone to shifting as they are being stitched, it is vital. Large thread regions, dense fabrics, and tight bobbin thread can all contribute to this movement in the thread. When developing a plan, it is imperative that you take into account the design principles of push and pull. Every digitization work is unique and requires a customized strategy to tackle it successfully. Distortion is yet another issue that confronts those who work with embroidery. The fact that many beginners end up with uneven digital designs is really aggravating. They can attempt to correct the issue by increasing the strain on the hoop or by gluing the garment in place.
Interpretation of Artwork
An embroidery digitizer is required to interpret a design prior to beginning the process of digitizing an embroidery design in order to establish the stitching path and other aspects of the design. Digitizers of embroidered designs are responsible for determining the optimal stitching sequence, fabric type, and size. The artwork needs to be analyzed first by the embroidery digitizer, who must then decide whether the artwork needs to be resized, the outlining removed, or the writing made larger. Additionally, time and experience are required to be certain that the design will function as expected. In order to prevent mistakes, it is vital to have a thorough understanding of the constraints imposed by both the embroidery machine and the material.
Picking the Right Stitch Type
The digitizer decides which sorts of stitches should be used in each region of the design by considering which stitches will most accurately portray the artwork. The underlay stitches are the first thing that the digitizer puts in. Even though you won’t be able to see the underlay stitches in the completed design, it’s still important to get them right because it will make the logo seem better overall. If you do not use the appropriate underlay, it is possible that the stitches will sink into the cloth, or that the design will enable the shirt fabric to show through. There are several varieties of run, satin, and fill stitches, despite the fact that there are only three fundamental types of stitches: run, satin, and fill.
The Embroidery sew-out
Even for an experienced digitizer, many left-chest business logos are very easy to scan. However, designs with fine detail, small lettering, color gradations, and lots of color shifts demand additional time for set-up. The process of digitizing is one that should be approached with caution and takes both time and experience to be carried out accurately. The digitizer is required to have an understanding of how the stitches displayed in his embroidery software will actually embroider various types of materials. Your company’s logo could benefit from being digitized professionally; therefore, you should search for an embroiderer that offers quality digitizing services.

