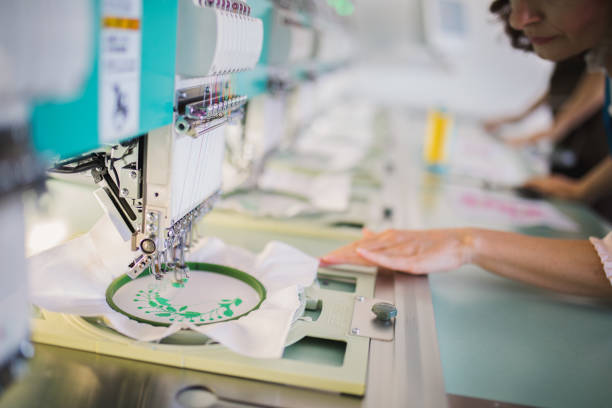
How to Digitize Embroidery: The Basic Steps
Find out the size, type of fabric, artwork, and any other special needs for the design.
Get artwork ready to be digitized. You can find USA best Embroidery Digitizing Company online.
The Design Run from Start to Finish on an Embroidery Machine
Assign different types of embroidery stitches to different places, taking into account things like the type of fabric and the “push and pull” of the garment.
Run the design to see if the digitizing needs to be changed.
Get to Know the Job of Digitizing
First, the person doing the digitizing needs to know what the job calls for. This means knowing how big the digitized design should be and what kind of fabric and clothing it will be embroidered on. It also requires learning how to understand the design. If the design has white spaces, should those spaces be filled with thread or should the background show through? The digitizer should also know if a certain digitizing style is needed or if a certain type of stitch needs to be used to match an existing design.
Getting Artwork Ready for Digitizing for Embroidery
The next step is for the digitizer to look at the artwork and decide if it needs to be changed for embroidery. The size of the finished design must be taken into account. Not every logo that was made for something like a business card will work well for embroidery. Many designs need to be changed or made easier to understand. Sometimes the name of the design and a small picture are all that is used. Some parts, like outlines, may need to be taken out, and small text may need to be made bigger and moved around.
Pathing in Digitizing
After the artwork has been changed in a graphics program, the file is opened in an embroidery program and used as a template to make a stitch file (computer file consisting of different stitch types). First, the digitizer has to choose how the logo’s “pathing” will go. The pathing is the order of stitches from the beginning to the end of a design. Pathing can change how a finished embroidered design will “lie.” If a design isn’t embroidered in the right order, you might end up with gaps in the fabric or text that isn’t even. During the embroidery process, the pathing will also affect how long the design will run on the machine. Even if the running time doesn’t matter to you, a shorter, smoother design will cost you less.
Giving Types of Embroidery Stitch
Next, the digitizer gives each part of the design a type of stitch based on what type of stitch will best show off the artwork. The first thing that the digitizer does is add the underlay stitches.
Even though you can’t see the underlay stitches in a finished logo, they are an important part of making a good-looking logo. Underlay helps stabilize the fabric to the backing, which is another important part of embroidery. It also smooths out the nap of the fabric so that the remaining stitches can work on a flat surface, and it adds density to the design.
If you don’t use the right underlay, the stitches might sink into the fabric or you might be able to see the shirt fabric through the design. There are only three basic types of stitches: run, satin, and fill. However, there are many different kinds of each of these. Fill stitches, for example, are used to cover large areas. The digitizer must decide what type of fill stitch to use, the direction of the fill, and where the fill should start and end in the design.
When making these choices, the digitizer has to think about what kind of fabric the logo will be embroidered on and make the right changes. Stitches will go down into fabrics like polar fleece and lay on top of fabrics like nylon that are more dense. A logo that was originally digitized for denim, where the stitches can lay on the surface, won’t look as good when embroidered on pique knit, where the stitches sink into the fabric.
Embroidery’s Ups and Downs
The “push and pull” is another important part of embroidery. While a design is being embroidered, it may move. Some stitches will come undone because of this. This can happen with thick fabrics, long stitches, lots of thread, and a tight bobbin thread. The effects of push and pull must be taken into account by a digitizer.
The Sew-Out for Embroidery
Even though many left chest business logos are easy for an experienced digitizer to work with, designs with fine detail, small text, color gradations, and a lot of color changes take longer to set up. Digitizing is a careful process that can only be done right with time and practice. The digitizer must know how the stitches he sees in his embroidery software will look on different fabrics. Your logo will look better if the design is digitized well, so look for an embroiderer who does good digitizing.

